Assembly#
If you're looking to assemble and operate this device, we recommend watchthe linked assembly video on YouTube.
Warnings#
TO AVOID DAMAGE TO THE SIMULATOR
Please begin with axis limits and gradually increase the motion range step by step, exercising caution.
We recommend starting limit of 12° on each axis and starting power of 30%.
Please begin with axis limits and gradually increase the motion range step by step, exercising caution.
We recommend starting limit of 12° on each axis and starting power of 30%.
ALWAYS KEEP THE RIGHT BALANCE TO AVOID WHEEL SLIPPING. IT CAN DAMAGE THE SHELL.
With player in the simulator if the shell doesn't move by itself, but it's easy to move it by hand in any direction, the shell is balanced well. You can adjust the balance if it is necessary. The seat balance can be adjusted by sitting forward or backward.
To keep the balance during the game, please don't make large movements with your body.
Before You Exit the Simulator
Ensure you either push the “STOP” button or turn off the power switch to prevent any potential issues.
Ensure you either push the “STOP” button or turn off the power switch to prevent any potential issues.
Basic Assembly#
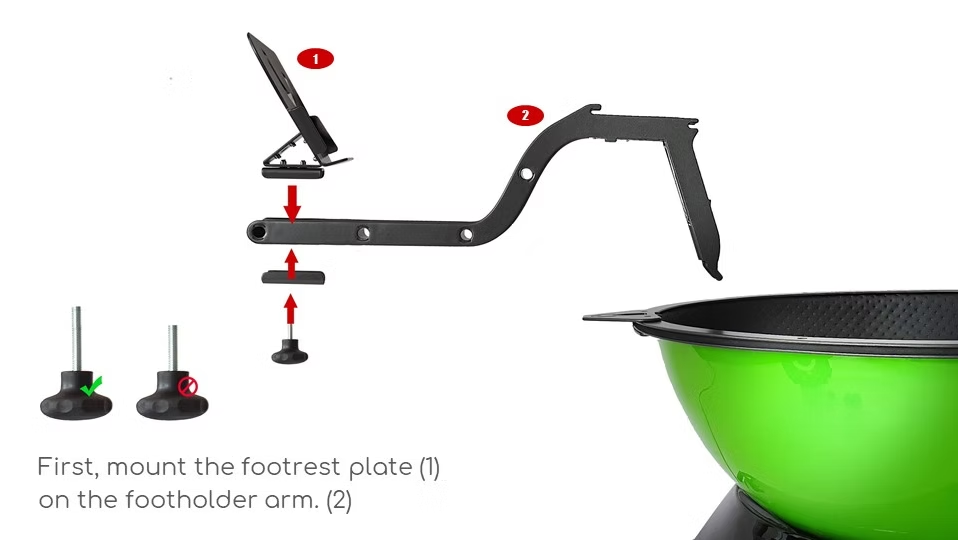
- Mount the footrest plate (1) on the footholder arm (2).
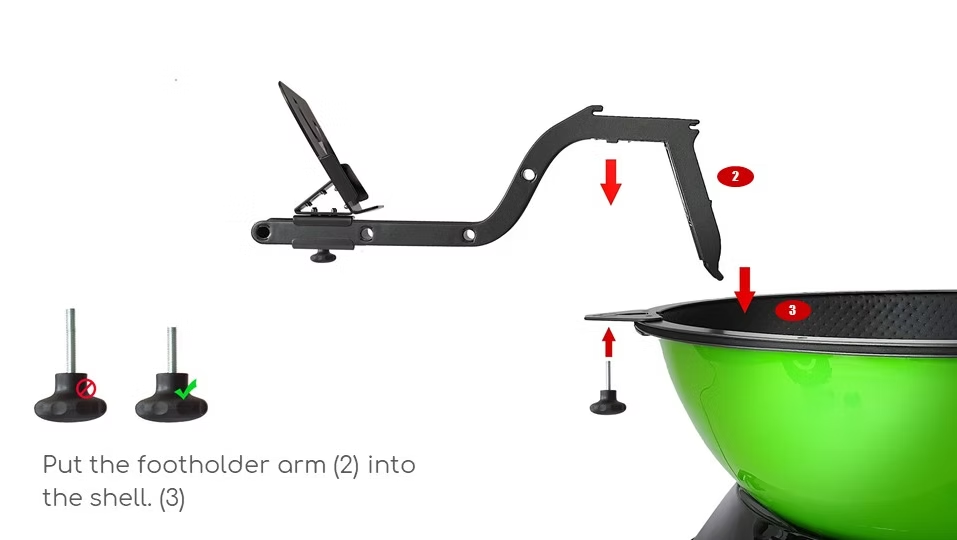
- Insert the foot holder arm (2) into the shell. (3)
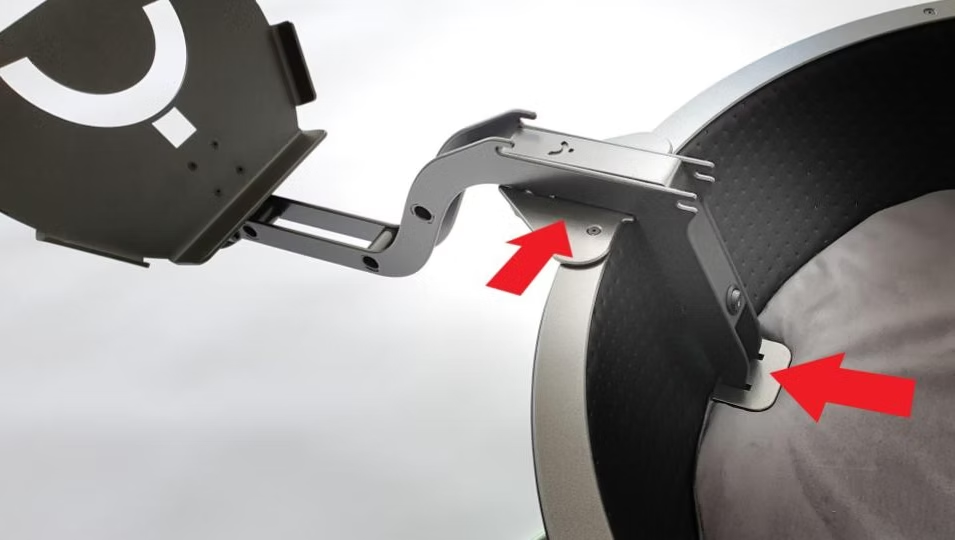
- Ensure a proper fit, especially when tightening the screws.
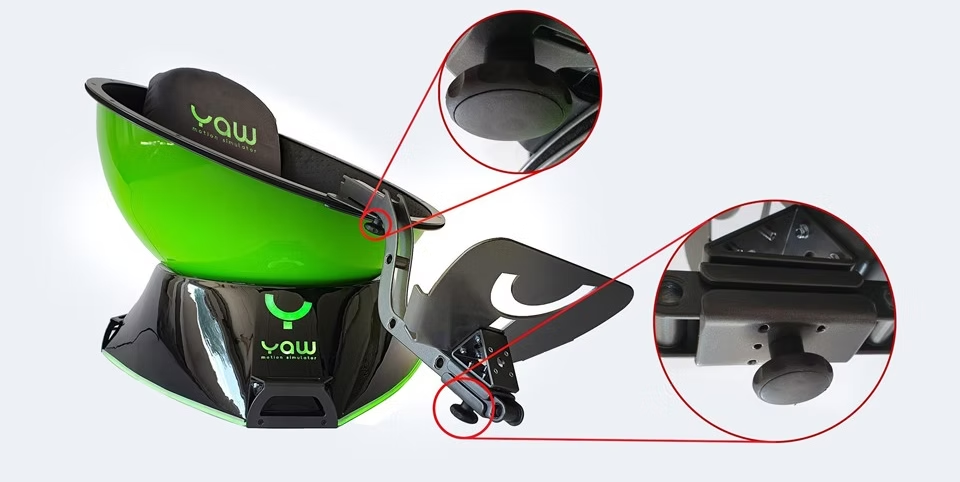
- Firmly tighten all screws to secure the assembly.
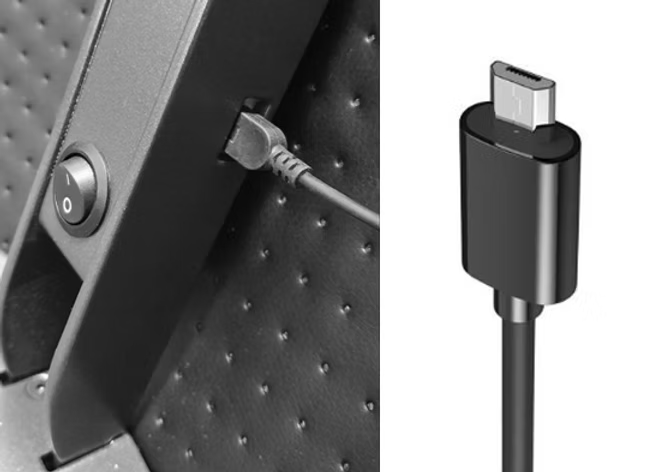
Turning on#
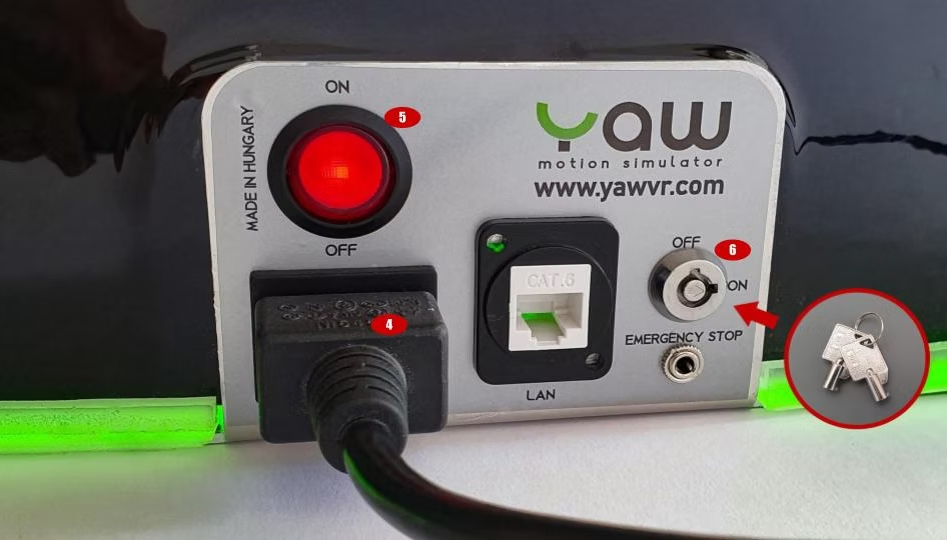
- Plug in the power cable (4)
- Turn on the simulator (5)
-
Remember to activate the motors (6) when you are ready to use the device.
-
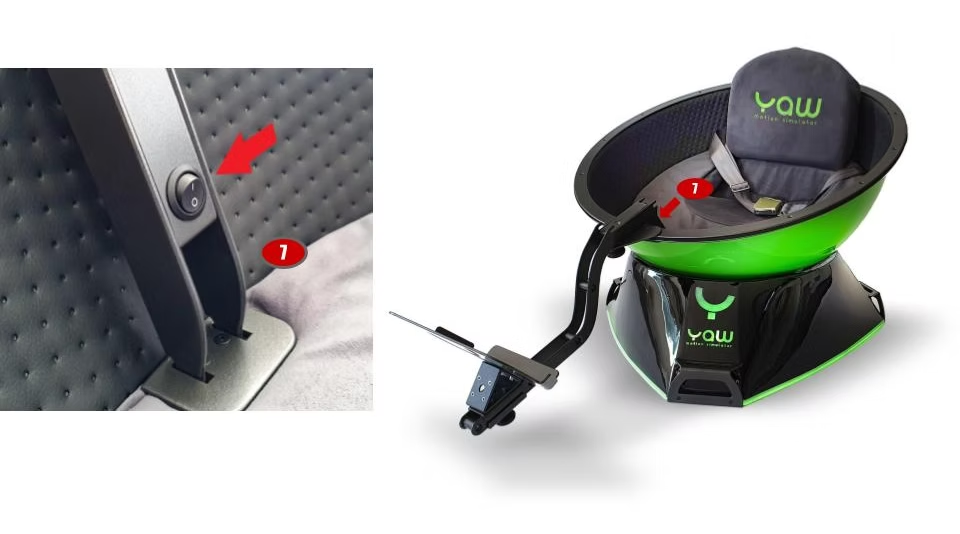
Now, turn on the position tracker (7)
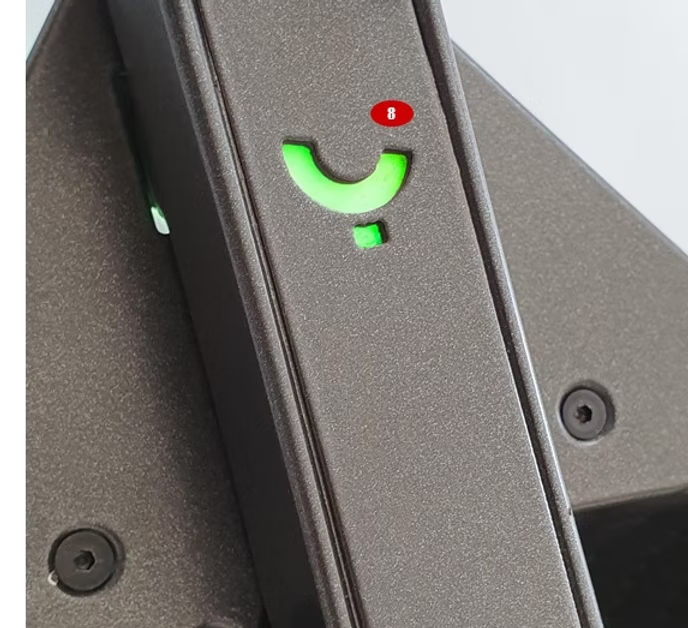
- If the indicator lamp (8) is green, the hardware setup is complete.
Charging#

If the indicator lamp (8) is blinking with green color, the position tracker should be charged.
Use a regular micro-USB charger; avoid fast chargers.
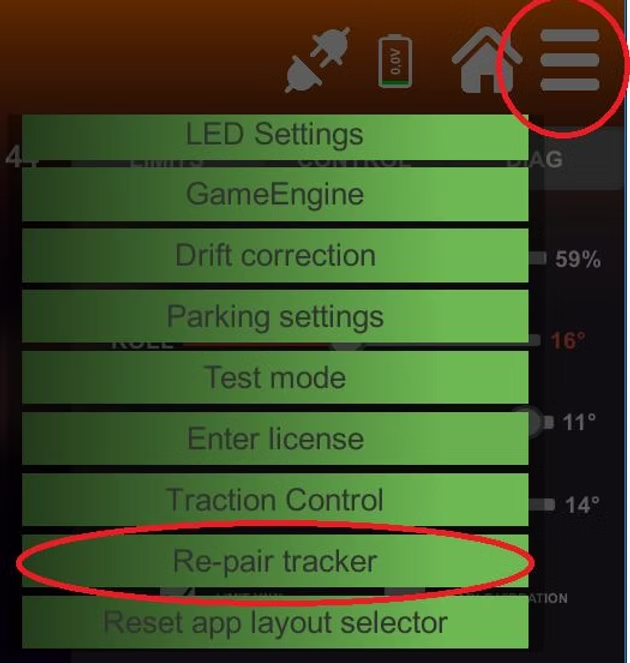
If the indicator lamp (8) blinks with red, the connection might be lost. Reconnect the tracker by re-pairing them in the app.